Set up returns and exchanges from start to finish
Configure policy, photos/video, replacement choices, public form, shipping and notifications.
- 1
Open the policy editor
Go to Automations → Returns & exchanges. Confirm the return provider and your plan's access. This screen configures the policy; submitted requests appear in Tickets. An external returns portal keeps its own rules and form.
- 2
Review the policy values
Paste your approved policy to draft settings with AI or enter them manually. Confirm refund/exchange days, allowed outcomes, non-returnable products, shipping fees and any restocking fee. Review every suggested field before saving; a text description alone does not override these controls.
- 3
Set evidence, warranty and replacement rules
Choose optional or required photos and describe what they must show. Configure video separately. In Request rules and customer form, set the date basis, late/repeat requests, warranty and replacement attributes. Use product exceptions where needed. For example, size-only keeps color and pack quantity fixed.
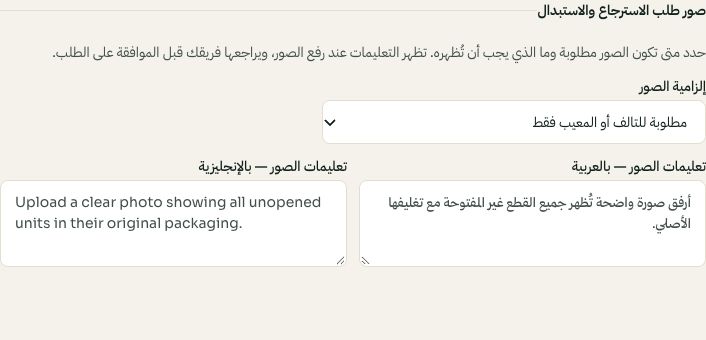
Photo requirement and bilingual instructions; the example text is a placeholder. Arabic interface shown; use the corresponding labels in your chosen language. Your available options and saved values may differ. Open the image to enlarge. - 4
Enable and review the customer page
Enable Returns page, choose the link identifier and branding, then save. Open the public link and inspect the instructions and fields. Enable the WhatsApp return-link option if you want the assistant to share it. A general return or order question should not create a ticket; a submitted form does.
- 5
Connect shipping and event messages separately
Configure Storage Station/ShipHero using your own account if you need pickup and replacement tools. Then select event templates in Return & exchange messages. Do not assume enabling the form creates a warehouse connection or guarantees a message at every stage.
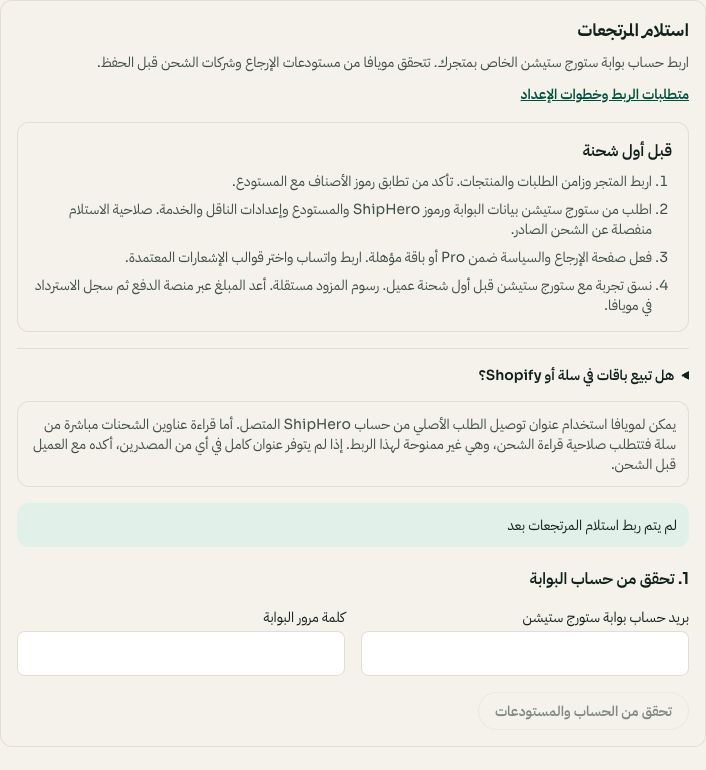
Review the warehouse checklist, then check your own Portal account. Arabic interface shown; use the corresponding labels in your chosen language. Your available options and saved values may differ. Open the image to enlarge. - 6
Review and process each request
In the ticket, compare the original item with the requested replacement, evidence, policy checks and prior warranty history. Staff approve or reject, then confirm any pickup, replacement or refund action separately. A submitted request is not an approved refund or a booked shipment.