Set up and activate your AI assistant
Describe your business, review settings and sample replies, then check auto-reply readiness.
- 1
Open Set up my AI
In Automations, choose «Set up my AI». Check the connection, plan and AI credit readiness shown at the top. The guided setup changes supported settings only; number-specific assistant profiles stay separate.

Start the guided AI setup from Automations. Arabic interface shown; use the corresponding labels in your chosen language. Your available options and saved values may differ. Open the image to enlarge. - 2
Describe your business rules
Explain what you sell, tone, working hours and which questions staff should handle. For example: answer return questions, require a photo of all unopened units on the return form, and send voice notes to staff. Review any missing information instead of inventing a policy.
- 3
Review settings, form and sample conversations
Check every suggested value and the customer form preview. Run the private test: it sends no customer messages and opens no tickets. The voice preview checks routing, not actual transcription. Save only after the examples match your policy.
- 4
Confirm automatic replies are active
Return to Automations → AI Assistant and review AI availability and auto-reply, channels, schedule, topic handling and handoff behavior. Check that the individual conversation is not paused or assigned to a human. Saving setup does not override those conditions. Test with a phone you control.
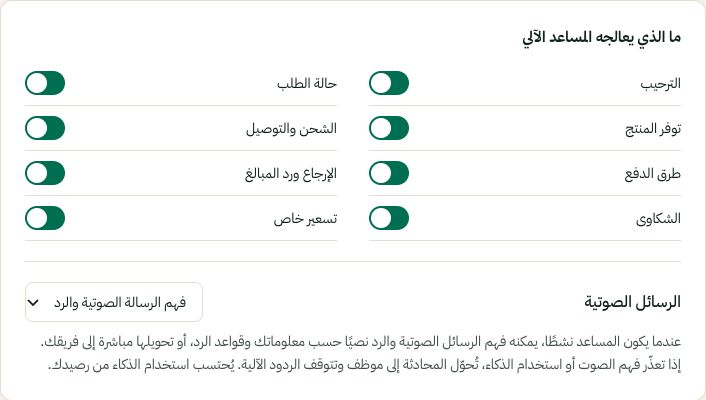
Choose the topics handled automatically and how voice notes are routed. Arabic interface shown; use the corresponding labels in your chosen language. Your available options and saved values may differ. Open the image to enlarge. - 5
Keep knowledge and settings consistent
Use the knowledge base for approved explanations; use ordinary settings for deadlines, evidence and routing. Changing a document alone does not change the return form. Review sampled replies and correct outdated documents or store data when needed.