Prepare and send a campaign
Choose real customer filters, preview an approved message, then send or schedule and review delivery.
- 1
Prepare your audience and template
Connect WhatsApp, confirm the sender number and get the intended template approved in its language. Open Campaigns and start a campaign. Check the limits and access shown for your current plan; an old free-plan description does not describe current paid plans. Meta message charges are separate.
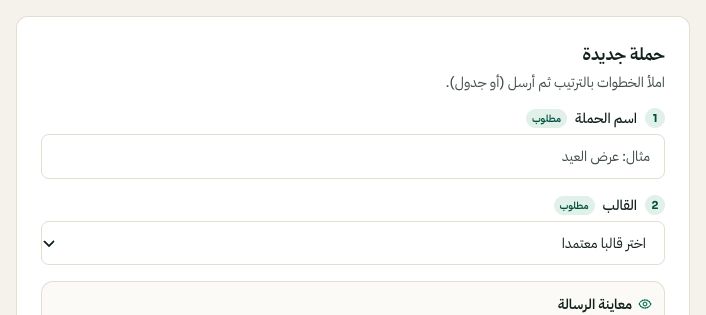
Start a campaign with a name and an approved template. Arabic interface shown; use the corresponding labels in your chosen language. Your available options and saved values may differ. Open the image to enlarge. - 2
Select and inspect recipients
Select a segment or advanced conditions such as a purchased product or time since last purchase. Results use synced store records, so confirm the store sync first. Review the audience count and sample contacts. Importing a phone number is not marketing consent; opted-out recipients are excluded from campaign sending.
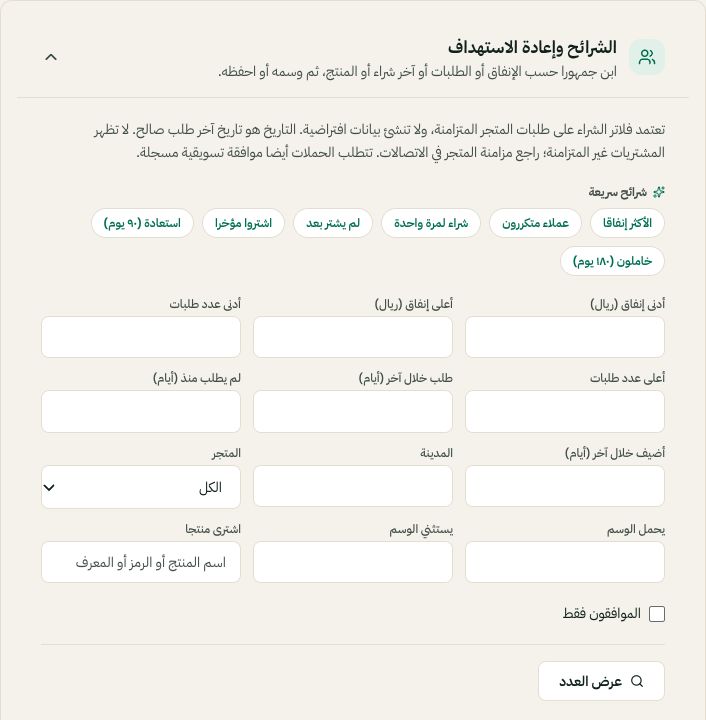
Audience rules use purchase, order-date, product and consent filters. Arabic interface shown; use the corresponding labels in your chosen language. Your available options and saved values may differ. Open the image to enlarge. - 3
Preview, then send or schedule
Choose the approved template, language, sender and variable values. Check the final preview and any attachment. Send now or choose Schedule for later and verify the date/time displayed. Sending contacts real customers; use a small audience of your own test contacts before a first live campaign.
- 4
Review the campaign history
Inspect delivery and failure states in the campaign history. A scheduled campaign can be cancelled before it sends. If sending is uncertain, inspect the original attempt instead of starting a duplicate. Reported orders/revenue follow the report's attribution rules; they do not prove the campaign caused a purchase.